How To Sew Pants That Fit
Are you searching for well fitting pants to sew? Has this ever happened to you? You get out of bed and then start getting ready for the day. You reach for a pair of pants, pull them on… and they are now firmly lodged somewhere between your waist and your hips. Ugh!
So you start looking for alternatives: a pair of looser fitting pants or a skirt or even a dress to cover those accursed hips…
But there has to be a better way to go about this.
If you can sew, now is the time to learn how to sew some pants that fit.
How Do You Fit Pants Perfectly
While the process of sewing pants is fairly simple…..fitting…Ah, yes fitting can be daunting because there are so many things to consider past the normal waist, hip and inseam measurements.
Now you have a whole laundry list of adjustments that you may need to consider after you’ve chosen a pattern to sew. Some of the more common areas prone to fitting issues are:
- Crotch depth
- Crotch curve
- Full or protruding rear
- Flat rear
- Low rear
- Round pubis
- Flat pubis
- Full tummy
- Sway back
- Fuller thighs
- Protruding calves
When fitting, you need to “read the wrinkles” in the garment to determine the adjustment that is needed. For pants it is easy to see where there is too much or too little fabric but the location for reducing or lengthening may not be as obvious. 5oo4 Patterns has a comprehensive pant fitting guide that covers most of the pattern fitting issues listed above. For this post the focus will be on fitting pants to a body with full inner thighs, a protruding rear and a fuller tummy.
Diagnose The Pant Fitting Issues
Before you learn how to sew pants that fit, you need choose your pattern, Next, make a muslin of the pants to diagnose the pant fitting issues. It is much easier to diagnose where and how the waist will sit so leave the waistband off for now. If you don’t have a fitting buddy, a mirror or your phone on a tripod will be the next best thing.
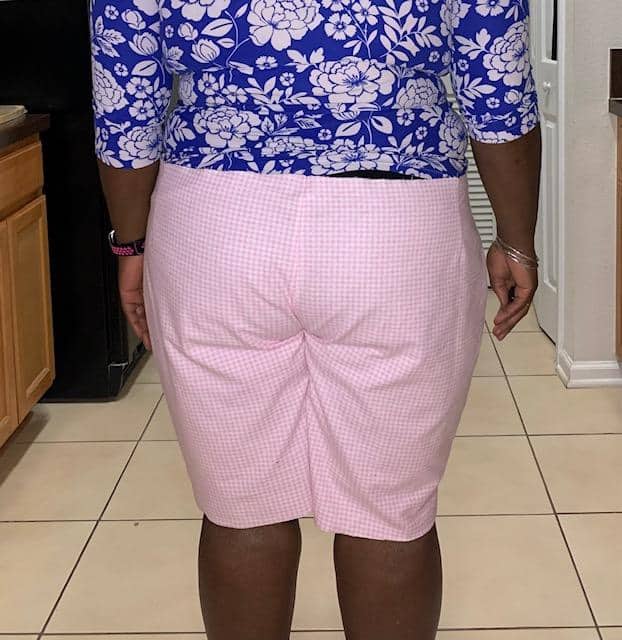
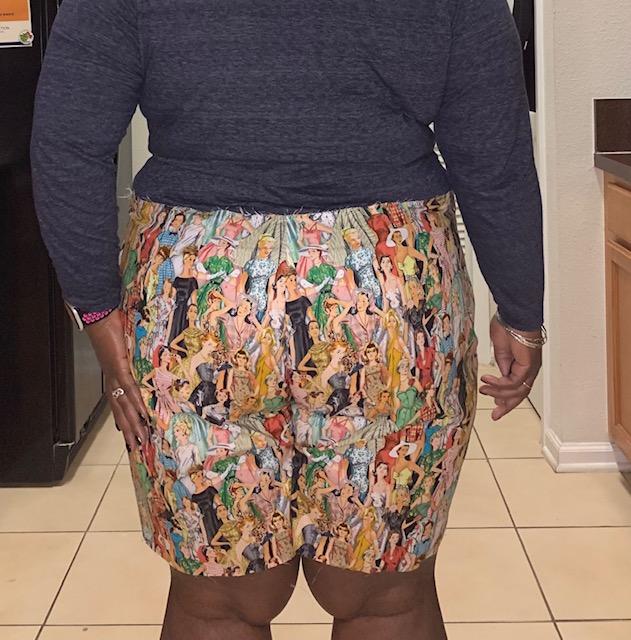
Take pictures of the front, side and back views of your pants. Try to stand in a neutral position to get the full scope of any issues. If the pants look like your bum is eating it and wrinkles are radiating lines that look like a smile under the bum; more length is needed in the crotch curve.
If you have excess fabric pooling in the front above the crotch as well, this is a further indication that more length is needed through the crotch curve. Lengthening both curves of the pattern in small increments (¼” to ½”) will prevent the pants from trying to get more length and creating a bunched mess.
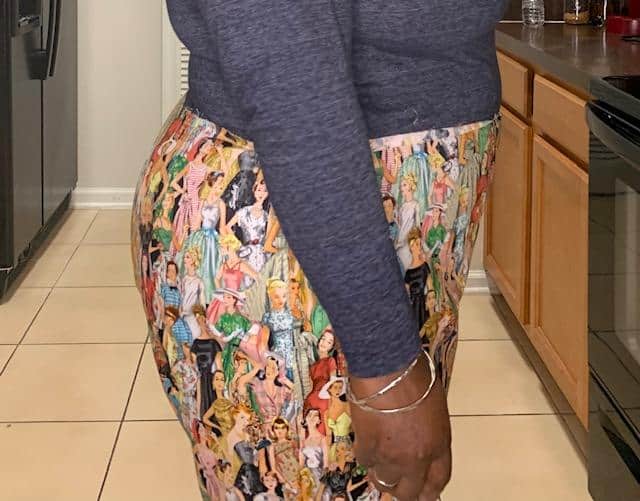
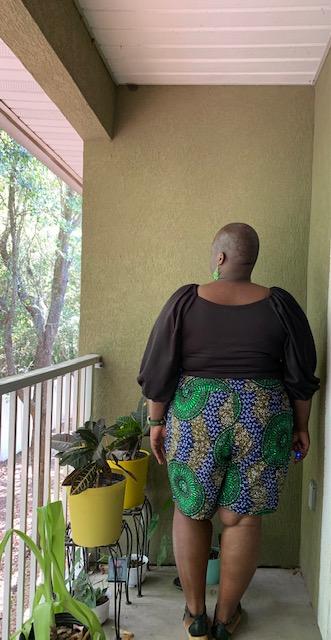
If you have a fuller rear, you will always notice that the back center seam of the pants sits far lower than is comfortable. This is an easy fix, increase the back rise of the pattern piece by the amount needed for the pants to sit comfortably at the small of your back.
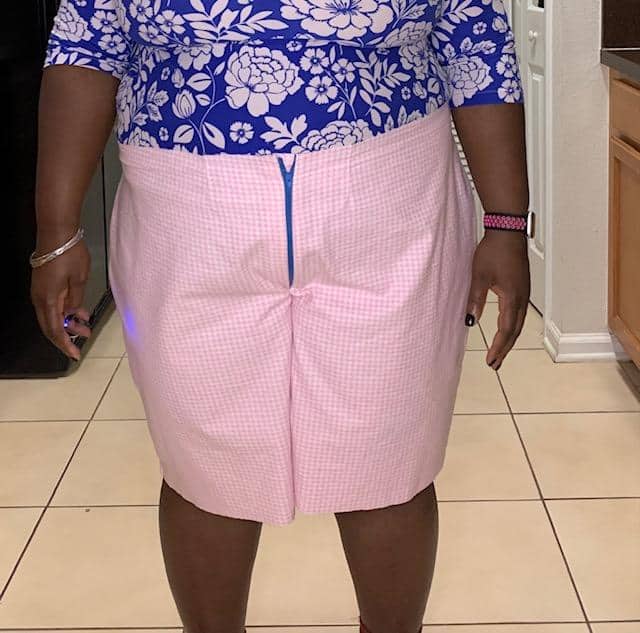
Fixing The Gaping Back Waistband
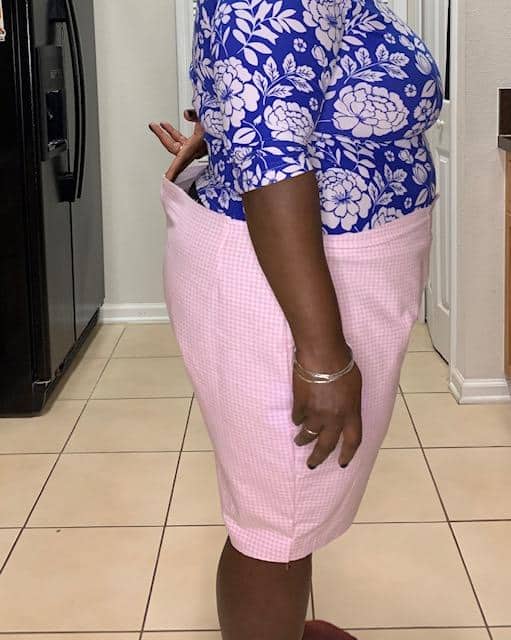
The waistband of your pants should lay flat against the small of your back for a perfect fit. Typically if you have a fuller rear, you will have gaping at the center back waist.
This fix is fairly simple to achieve by adjusting the center back seam. While wearing the pants, pinch the excess fabric and pin to secure. Remove the pants and determine how much excess fabric needs to be removed.
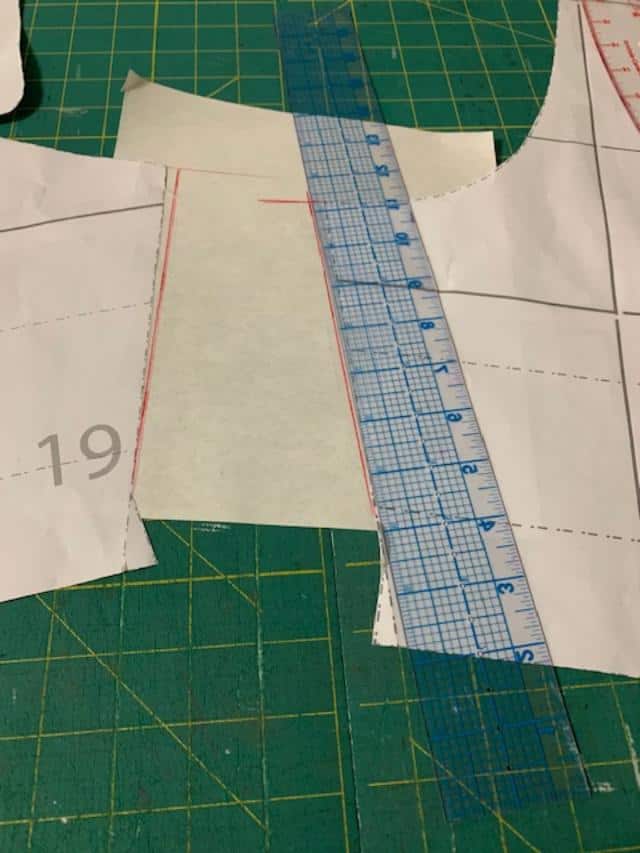
Halve the amount and make the adjustment to the back center seam. You’re going to taper the down about 2” – 3” from the new center seam mark to the original center seam. Effectively, you’re taking just a small wedge out of the pattern so that the back center seam conforms to your shape.
Don’t under any circumstances, make any changes to the side seam! That’s not going to fix the problem. Next, make another muslin to verify that all your adjustments were successful. If not, follow the steps above and keep tweaking the pattern in small increments until you get the fit correct.
Do not be tempted to over fit! If you’re making a pair of woven pants, you will still need some ease to move around and most importantly, sit. There is no point in getting the pants to fit you perfectly if you bust seams when you sit down.
Conclusion
Whether you are an advanced beginner or intermediate sewist, it is never too early to learn how to sew pants that fit. If pants are too intimidating, start off with shorts. That way you can conserve your precious fabric while perfecting the fit. So, are you ready to sew some pants with me? Let’s do this!