How To Sew A Lapped Zipper
Now that you’ve mastered sewing a centered zipper, let’s learn how to sew a lapped zipper. I love lapped zippers because they are just as versatile as a centered zipper.
Lapped zippers are typically used in garments that are more tailored like skirts, trousers and dresses. A lapped zipper also works well in home decor such as those fancy zippered back throw pillows your mom has on her couch.
What Is A Lapped Zipper
A lapped or concealed zipper is the more sophisticated version of a centered zipper. With the centered zipper insertion, the zipper teeth and tape are partially concealed.
With a lapped zipper, the zipper teeth and tape are completely concealed with only one line of stitching visible on the exterior of the garment. Also, they are less fiddly than an invisible zipper insertion while still providing a tailored look to your garment.
Additionally, you can get all of this concealed goodness with a regular nylon zipper.
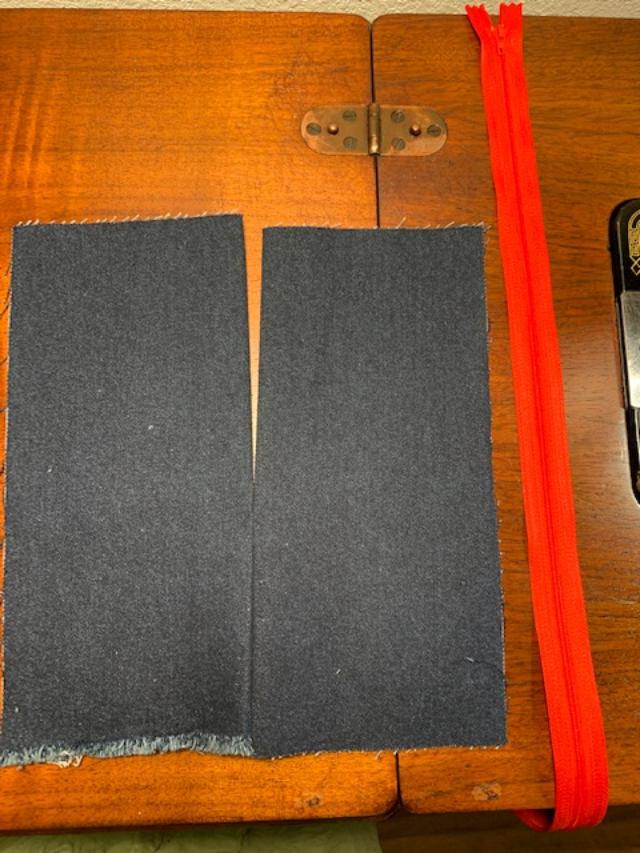
Supplies Needed To Insert A Lapped Zipper
Sample fabric or garment to be sewn
Wash-Away tape or pins or hand sewing needle
Two 1” strips of lightweight fusible interfacing (SF101)
Regular or all purpose zipper
Zipper foot
Regular sewing foot
Sewing machine
Thread

Prepare The Fabric
Finish the raw edges of your fabric. Place the two strips of lightweight fusible interfacing on the wrong side of the fabric. Zippered seams see a lot of action so you want to reinforce them before you insert the zipper.
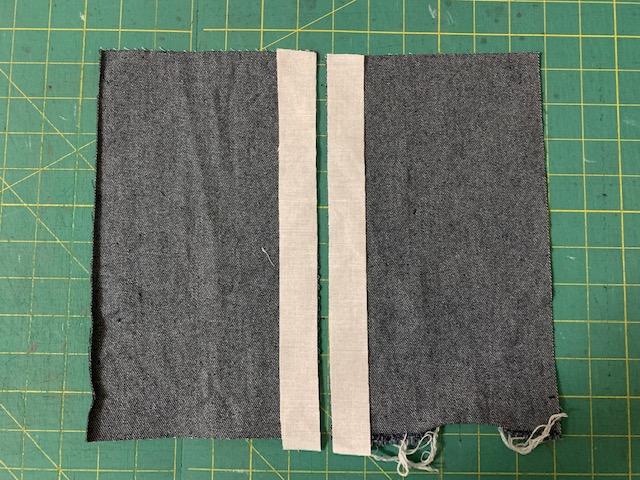
Press the interfacing to your fabric using the manufacturer’s instructions or a hot iron. Mark a 1” seam allowance from the top of your fabric to the bottom. Repeat on the other side.
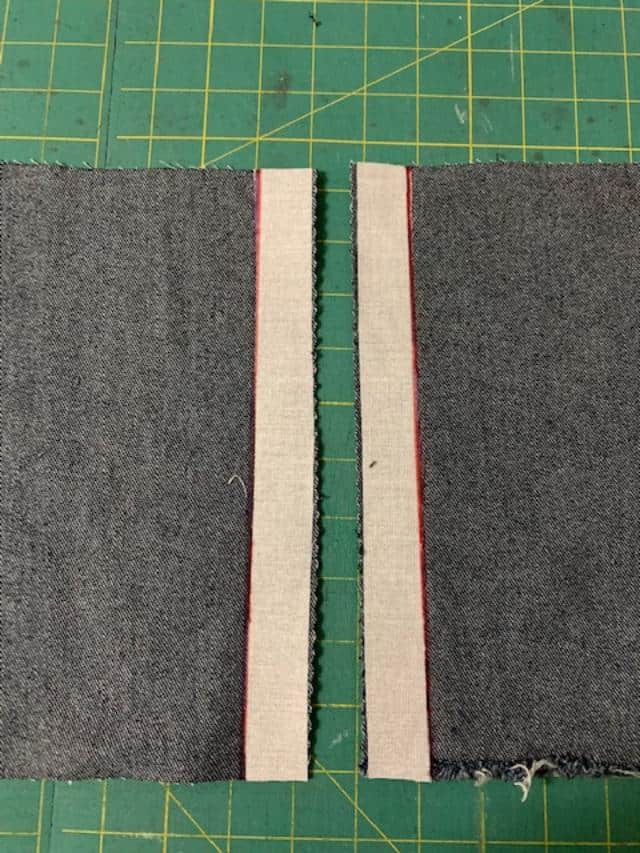
Next, make a mark for where you want the zipper to stop.
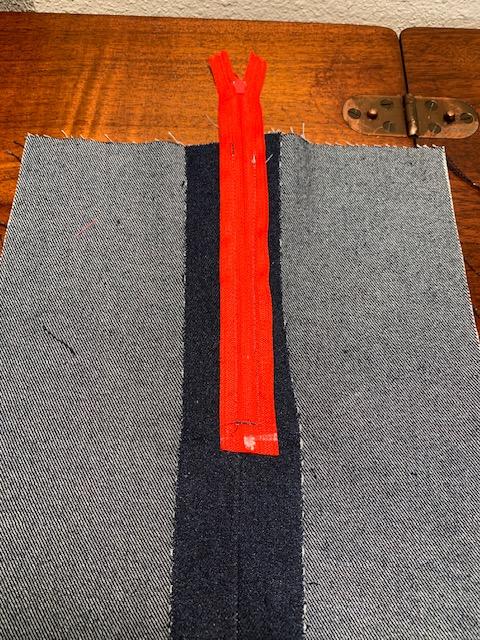
Let’s Sew A Lapped Zipper
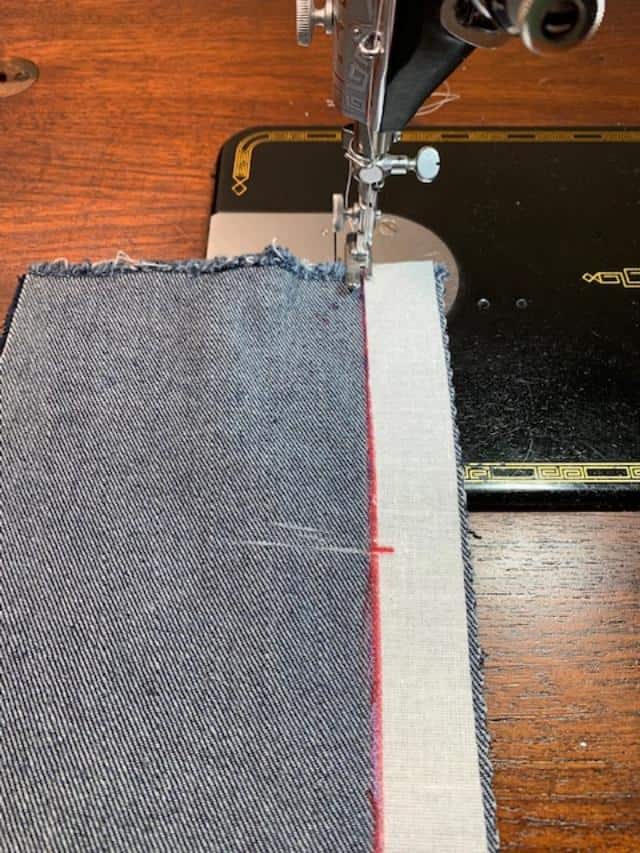
With your fabric right sides together, sew the lower half of your seam up to the mark for the end of the zipper using a regular stitch length. Make sure you backstitch to lock the stitches in.
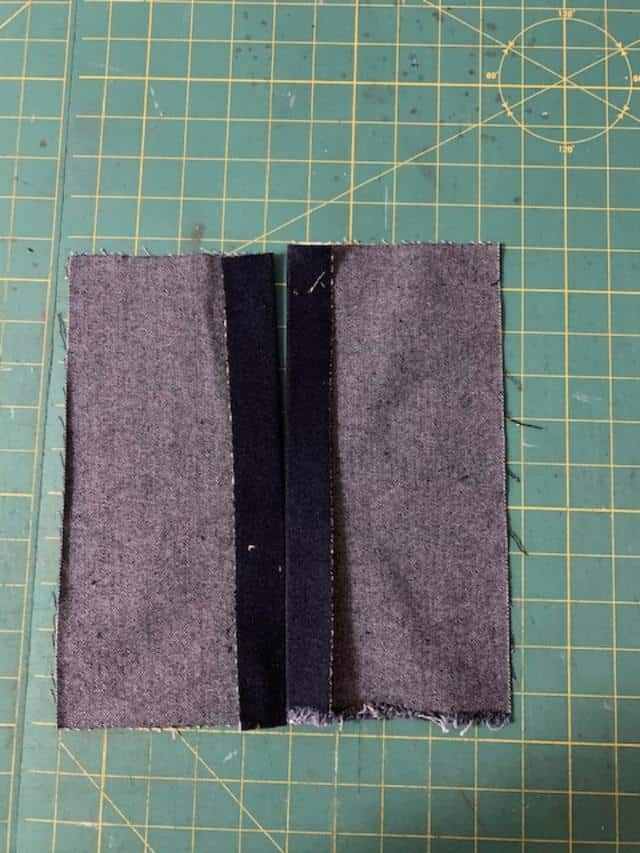
Press the lower seam open. With the wrong side of the fabric facing you, press the left hand side of the open with the entire 1” seam allowance. For the right side of the seam, press the seam slightly smaller.
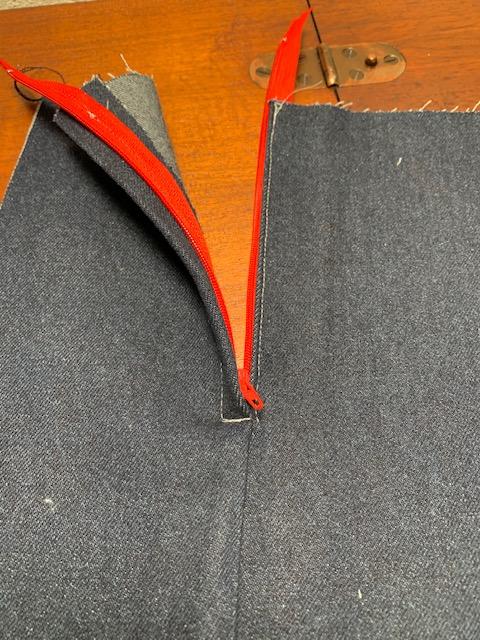
Since you want the overlap to be about an ⅛” wider, press the right side to ⅞”. With the zipper teeth facing up and the right of the fabric facing up, pin or baste the zipper to the right side of the seam.
Sew down to the end of the zipper, pivot and sew up the other side of the zipper. To make this process easier or to make sure the overlap remains in place, you can pin or baste this step prior to sewing.


Voila! A Finished Zipper

If your first line of stitching peaks out on the right side, rip out the stitches and sew it again. Press the seam one more time.
Now that you know how to sew a lapped zipper, what will you sew it in next? You can always practice by adding one to a skirt, a dress or maybe a cute cushion for your mom. Happy sewing!