
16 Essential Tools Required for Sewing!
Now that you decided to learn how to sew, what tools do you need? Below are 16 essential tools required for sewing.
Congratulations and welcome to sew club!
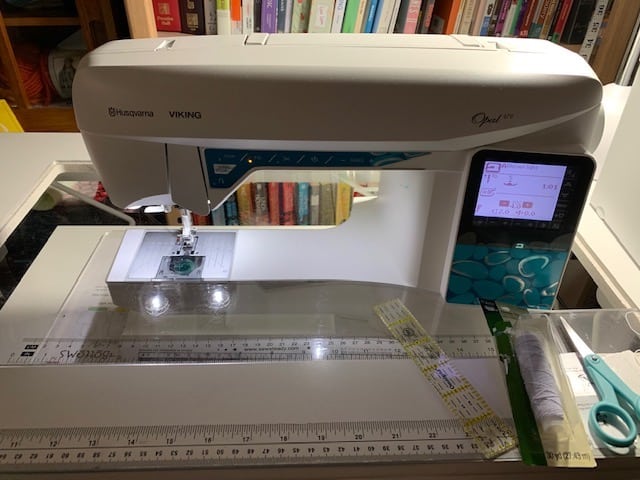
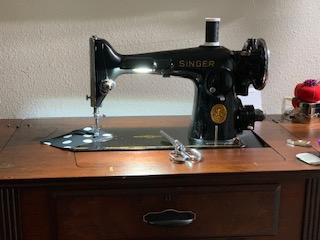
1. Sewing machine
A sewing machine makes the sewing process much faster and more enjoyable in my humble opinion. If you already own a sewing machine, excellent!
No need to look any further. Pull that old girl out, hunt down the manual and familiarize yourself with the stitches and accessories included.
The vast majority of sewing requires the straight stitch to complete a garment so don’t be tempted to invest in a high dollar sewing machine.
A sewing machine that has utility stitches beyond zig-zag, lightening bolt or hem stitches is a bonus but not required to create beautiful and wearable garments.
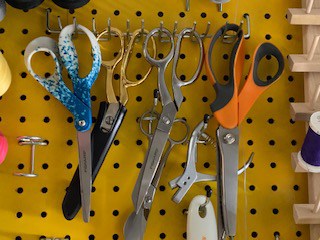
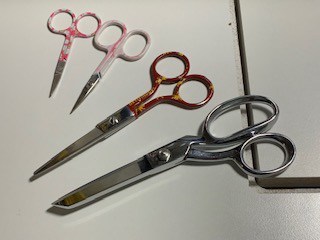
2. Scissors
You will need one for paper and one for fabric. The paper scissor should be an inexpensive or an old pair that is no longer suitable for cutting fabric.
The fabric scissor should be reasonably priced and fairly sharp. A good option is a pair of 8″ bent dressmaker’s scissors. You will use the paper scissors to cut paper, i.e patterns only.
Don’t be tempted to use one scissor for both paper and fabric. Paper dulls the blade and consistent usage will prevent you from getting clean cuts in your fabric. To be safe, mark the designated fabric scissors as thus and guard it with your life! 🙂
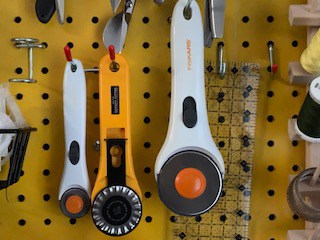
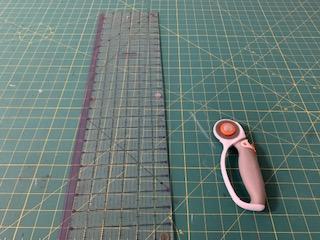
3. Rotary cutter and self healing cutting mat
Whether you intend to sew with knits, delicate fabric or regular cotton, you might want to invest in a rotary cutter and a self healing cutting mat. You will need both as you cannot use a rotary cutter without a cutting mat.
The standard size blade needed for cottons or light to medium woven fabric is 45mm. This pizza cutter lookalike is very sharp so mind your fingers! A rotary cutter provides long clean cuts fairly quickly without the need to pin the pattern piece to the fabric.
To keep the fabric and pattern secure to ensure accurate cutting, you will need pattern weights. Pattern weights can be anything that you currently have available in the house.
I’ve used granite samples, cans of soup or beans, a weighted tape dispenser, or even bags of rice or beans.
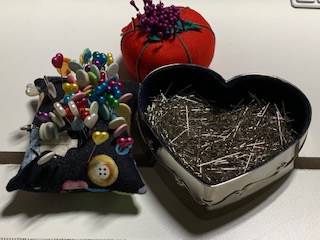
4. Pins
Straight pins are used in sewing to hold fabric in place for a vast number of applications including seams, hemming or holding a dart in place. Glass head pins are best for general sewing as they do not melt when they come in contact with a hot iron.
As you sew with more delicate fabric, finer glass head pins would be more suitable. Alternatively, you can substitute clips or even clothes pins to hold thicker fabrics in place instead.
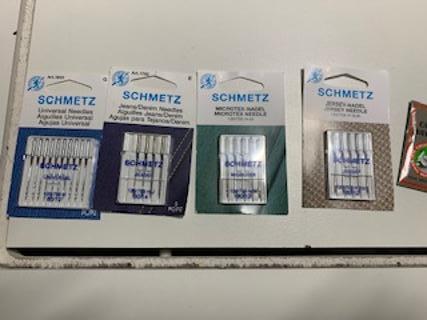
5. Sewing Machine Needles
The most commonly used sewing machine needle is the universal needle in sizes 80/12 or 90/14. Both needles can be used to sew light to medium weight woven fabric.
Thicker fabrics like denim will need either a denim needle or a size 100/16. This needle is best used for heavier weight fabric or when top stitching through several layers of thick fabric.
For knits, ballpoint or stretch needles are required to create and maintain a proper stitch.
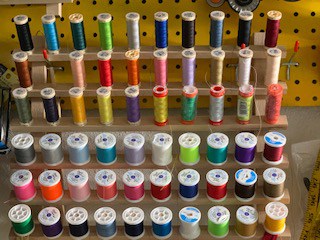
6. Thread
For most sewing projects, you will need all purpose polyester thread for the vast majority of garment sewing. To start, choose basic colors to match your fabric or colors that will blend well enough without contrasting with your fabric.
Don’t be tempted to buy all the colors offered upfront as you probably won’t need them. Also, do not be tempted buy bargain basement threads as they are typically not as sturdy.
Specialized thread for hemming and embellishments are optional and but are not required to start sewing.
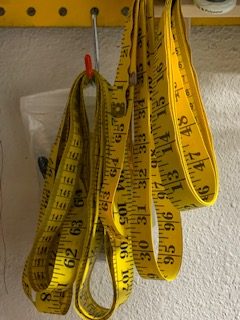
7. Tape measure
Sewing to fit a three dimensional body requires proper measurements. To obtain this, you will need a tape measure.
Tape measures are not all created equal so look for one that is 120″. You will also need to ensure that the 1″ measurement matches a ruler that you trust.
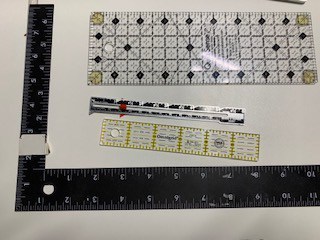
8. Seam Gauge
A seam gauge can be used to measure seam allowances, hems and button and button hole placement. It can also be used as a straight edge in a pinch. Alternatively, a short ruler can be substituted for the same purpose.
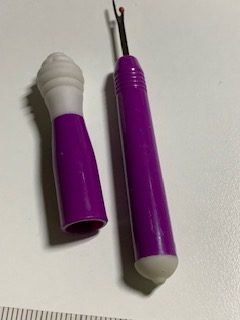
9. Seam Ripper
The dreaded seam ripper or unpicker will be your best friend or your worst enemy. Even experienced sewers have at least one seam ripper on hand to rip out existing seams while repurposing a garment or to cut open a button hole.
Mainly, the seam ripper is used to erase the horror of crooked seams, to remove all evidence of the sleeve attached incorrectly to the neck or all manner of sewing mishaps. Trust us, anyone that sews uses a seam ripper!
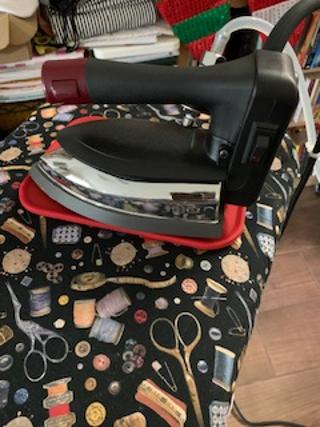
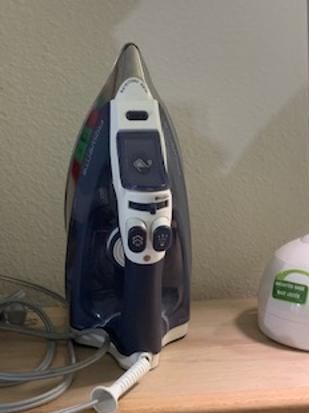
10. Iron
Next to the sewing machine, an iron will be your most used and valued tool in sewing. Even if you have the best fabric and you took the time to ensure that your seams are perfect, your garment will never look it’s best if your seams are not pressed.
A good press can take your make from looking forlorn and homemade to crisp and professional. A basic iron with multiple fabric settings, consistent heating and good steam is best.
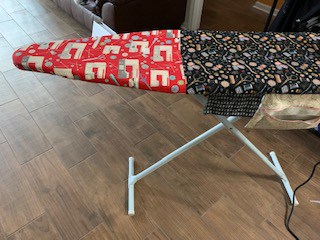
11. Ironing board
The lowly ironing board is also a necessary tool for sewing. It can be the family ironing board, a small table top version or a DIY version consisting of a sturdy board, batting and fabric of your choice stapled together.
As long as it’s a stable surface that you can press your makes on, it’ll do!
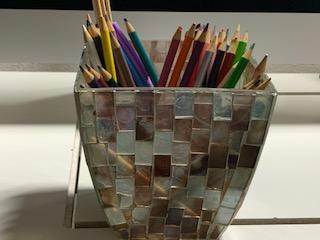
12. Marking tools
Marking tools like heat erasable wax chalk, heat erasable pens, water erasable markers are perfect for transferring notches, darts and and all pattern markings to your garment. Tracing paper and a tracing wheel are perfect for marking darts on the wrong side of the fabric.
Alternatively, a #2 pencil, color pencils or washable markers will work just as well. If using a pencil, mark the wrong side of the fabric so that the pencil mark will not show on the right side of your make.
13. Sturdy surface
While the floor will work in a pinch to spread out your fabric and pattern pieces for cutting, it’s not really good for your back if used long term. You can commandeer a desk or even the dining room table for use as your cutting surface.
Ideally the table should be stomach height to prevent you from straining your back whilst you are leaning over it. If space is limited, this surface can double as your sewing table.
14. Seating
Where you sit while sewing is very important. You want a chair or stool that is comparable in height to your sewing table. You’ll be seated for an extended period whilst sewing therefore you want to be comfortable while sewing.
It is best to choose a chair that allows you to keep your elbow parallel to your sewing surface and your back supported at all times to prevent strain on your back and neck.
15. Fabric
Ahhhh, the fabric! This is both fun and terrifying as there are so many fabrics to choose from. First, use your closet as your initial point of reference. Take a look at your favorite garments.
Close your eyes and feel the fabric, then look at how they drape off the hanger and when worn. Look at the fabric content on the label and use that to familiarize yourself with the names.
Visit your local fabric store for the full immersive experience and feel the fabric. Don’t worry, no one will judge you or think you’re weird. Your goal is to become comfortable with fabric types, widths and drape.
16. Thread snips and pinking shears
You’ll need to keep either small embroidery scissors or thread snips close at hand when sewing. We advise against using your fabric scissors for this as they are typically too large and cumbersome for clipping stray threads.
Also you don’t want to have an accident and cut a hole in your garment. Pinking shears serves as a seam finisher in lieu of a serged edge or zig zag seam.
Conclusion
Sewing requires practice and patience. You will make mistakes. You will make items that may not fit. Heck, you may make something one minute and decide you hate it the next. That’s ok. Sewing is a skill that only requires a little patience and a lot of practice. Having decided that you want to learn to sew, get your tools and supplies ready to start on your sewing journey.