10 Do’s and Don’ts of Sewing
The ability to sew is a life skill that every adult should have. Not everyone wants to learn the skill to make money or as a way to save money. In truth, sewing your own clothes is definitely not less inexpensive than purchasing ready to wear clothing. Fabric can be costly but the ability to make clothes that fit is invaluable. Since you’ve decided to learn the skill of sewing, here are some do’s and don’ts to help you succeed.
The Do’s of Sewing
1. Read the pattern instructions! Please!
Better yet, read it several times in order to understand the steps presented in order to complete the garment. Whether you purchase a pattern from the Big Four (Mccalls, Simplicity et al) or from an independent PDF pattern designer, there are always instructions. Having tested PDF patterns for a couple of years from several designers, I can tell you that the instructions provided are comprehensive. The instructions provide the seam allowance or lack thereof, seam treatments, the general order of creation and any special instructions included to make your garment a success. Most patterns provide the measuring, cutting, sewing and fitting instructions early in the first few pages. Familiarize yourself with the measurements and how to choose the size(s) that fit you. Some patterns will give you basic instructions to grade from one size to the next, again to help you get a better fit. Keep the instructions close at hand so that you can reference it whilst sewing.
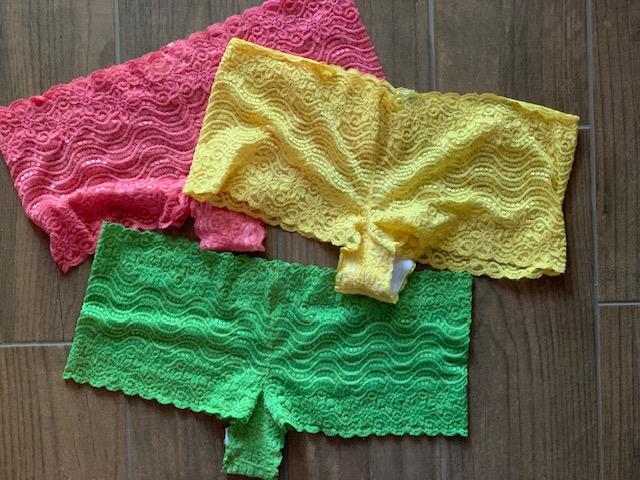
2. Choose the proper fabric for the project!
If the pattern calls for a knit fabric, choose the suggested knit fabric not a woven fabric. Keep in mind that knit patterns are drafted with negative ease so the finished garment is actually smaller than your body and will stretch to accommodate you. Woven fabrics have zero to minimal stretch on the straight and crosswise grain therefore they are not suitable substitutes for knits. Some stretch wovens include Elastane or Lycra but unless the stretch percentage matches the knit, the finished garment will not fit. On the other hand, you can substitute a stable knit (Ponte, Liverpool, Scuba) for a woven pattern but you will need to decrease your measured pattern size to accommodate the additional stretch.
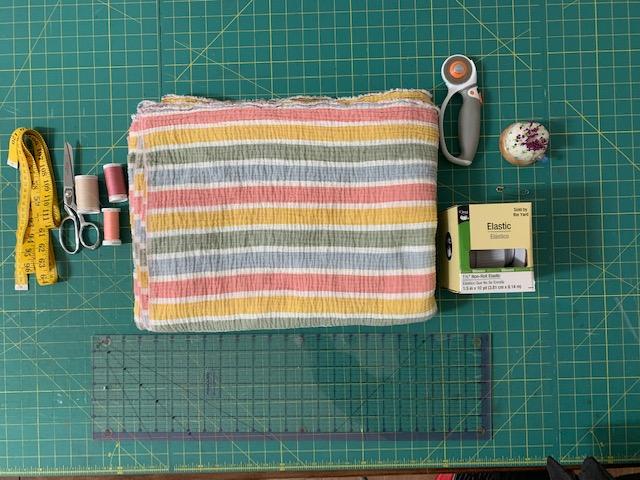
3. Wash your fabric prior to cutting!
If you intend to launder the project, you will need to wash and dry the fabric prior to cutting and sewing it. When the fabric comes off the bolt at the store, it is gloriously smooth and beautiful but often funky. Funkiness is the least of your worries as you have no idea how the fabric was stored and transported prior to purchase. The fabric creation process does not include laundering so any residual chemicals used will remain. To nip future shrinkage, potential itchiness, irritation and dye transfer from happening, wash the fabric! You’ll be very cross if you neglect to wash the fabric for that beautiful shirt you just made and wore once, it is now three sizes smaller after one wash.
4. Make a muslin!
Unless you’ve made the pattern before and are certain it will fit you in your fashion fabric, make a muslin! Fabric is expensive so don’t waste your money by just winging it only to be disappointed. No one really wants to do it but neither do you want to take the time to sew up something in your expensive fabric only to find that it doesn’t fit. Muslin is the generic term used for a utility fabric typically used for test sewing. To keep it simple, when the term muslin is used on this website, it means a test garment in the appropriate fabric type suggested for your final project. Another name for muslin is toile. It will also be used interchangeably on this website.
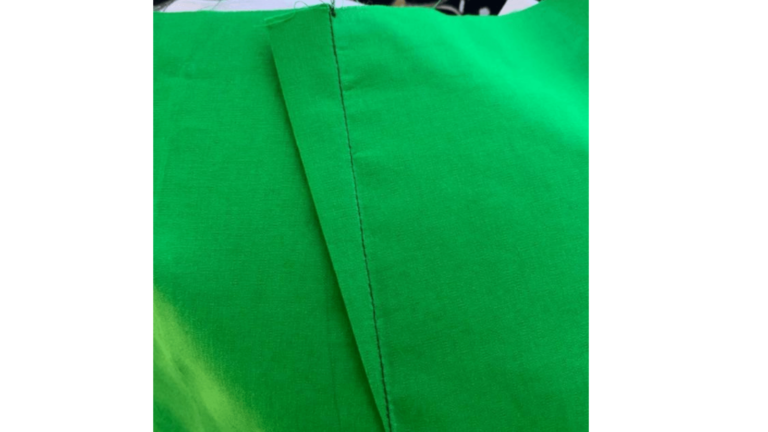
5. Press your seams!
Garment construction is mainly cutting, fitting, pressing/ironing and eventually sewing. You will spend most of the time sewing a seam, then pressing to set the seam. Failure to do so will make the seam lay incorrectly on your body once worn. You want your hand made garment to look professional and not homemade. Pressing makes your garment continuously and upon completion eliminates any semblance of sloppy and unprofessional. As this is not the look we are going for when sewing our own clothes, press those seams! In addition, always clip your curves. If you don’t, that neckline or any curved seam will just not lay right.
The Don’ts
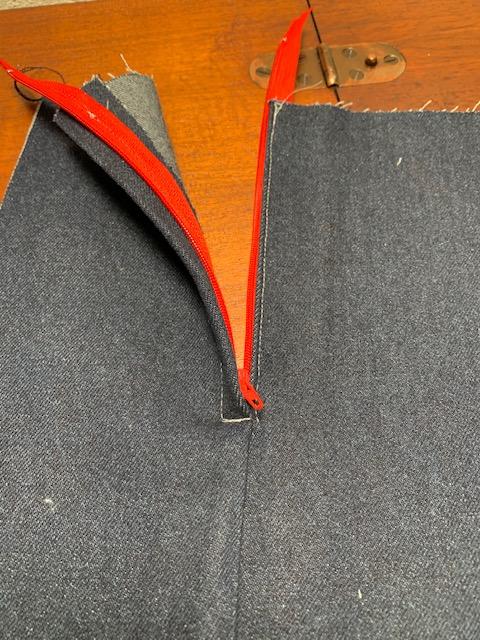
1. Don’t overreach too soon!
If you are a beginner sewer, the quickest way to frustrate yourself and stall your progress is overreaching your current skill level too soon. This is by no means a statement telling you to only work on beginner projects and stay away from challenges. Oh no no! As a beginner that just learned how to make an A-line skirt, your next project probably should not be a pair of jeans. There is nothing wrong with working towards those jeans just be mindful that there are steps in between before you get to that point. Never fear, you will be sewing and wearing those jeans with pride in no time!
2. Don’t compare ready to wear sizing to sewing pattern sizes!
Ready to wear sizing and sewing pattern sizing are NOT interchangeable so don’t compare them. If you have the hang up of being a certain size in ready to wear then prepare yourself for the shock of needing to sew a larger size. If you want your finished garment to fit properly, use your current actual measurements. Look, I get it, we all want to have a “smaller number”, however, forget that and choose the correct size based on your current measurements. This is not the time to downplay your measurements. Guess what? No one is watching you whilst you take your measurements nor is it any of their business what that number is. Once you’ve sewn a fabulous garment that fits you perfectly, you won’t be that fussed about what size it is. Heck, you can create your own sizing system if you feel like it.
3. Don’t be afraid to adjust the pattern to fit!
Unless you’ve drafted the pattern yourself from your actual measurements or all your measurements fall into one pattern size, you’ll need to make some adjustments for fit. The most common adjustments are for height, bust or for variations across sizes. Adjusting for height is fairly easy as long as you know what height the pattern was drafted for. Most PDF patterns will list this information and will provide instructions for lengthening and shortening the pattern pieces. Fitting for larger busts is trickier but perfectly achievable with proper instructions. The most common adjustments are full and small bust adjustments. Grading between sizes takes time to perfect, but the outcome is a garment tailored to you and well worth the effort.
4. Don’t watch the needle when sewing!
Never watch the needle when sewing as this will have you veering off course and creating drunken seams. Instead, keep your eye on the seam markings of the throat plate if applicable. If a seam guide is not available, create one by measuring the required seam allowance from the centered needle. You can then place a piece of painter’s tape, washi tape or use a magnetic seam guide for visual reference. Just line your fabric up with the edge of your makeshift guide and you’re good to. By keeping your eyes on the seam guide of your choice, you’ll end up with straighter seams and make less seam allowance errors.
5. Stay away from tricky fabrics….in the beginning!
Sewing can be an enjoyable, relaxing and extremely creative purpose. Start out with wovens and stable knits to get into the habit of creating a seam, gauging how your machine works, what thread to use and when to change your needle. Once you are comfortable with a few wearable garments under your belt in various fabrics, then you can tackle trickier fabrics. You can always purchase samples or remnants of chiffon or velvet to get to know the fabric. You don’t want to start working on a beautiful project only to find that chiffon shifts all over the place and velvet moves like someone is chasing it. That’s enough trickery to make a sane person scream. By getting comfortable with a smaller piece of tricky fabric, you’ll be better prepared for working with a larger garment.
Conclusion
Sewing is a challenging yet rewarding skill. You want to start out with a solid foundation of basic knowledge and then build upon the skill through repetition. By picking up some good habits and being aware of yet disregarding the bad ones, you will be creating garments that you love and that fit you in no time. At the end of the day, it’s just fabric so you can always rip out the seams and start again.